
A call flow is a second-layer menu for one specific need, such as order lookup, returns, or a Chinese-language line. The first layer, the phone menu, greets every caller; a call flow takes over only when a caller presses the key that points to it. Each flow has its own greeting, key menu, fallback, and no-answer settings, using the same four blocks as the phone menu.
A Working Example
ABC Company sells online. Callers mostly fall into two groups: people who want to buy something (sales) and people who need help with an order (customer service). The first layer splits by department: on the phone menu, key 1 uses the action Ring User(s) with the sales member as the destination, and key 2 uses Transfer Call to Call Flow with a flow named Customer Service as the destination. The first-layer greeting can be one line: "Hi, you've reached ABC Company. For sales press 1. For customer service press 2."
The Customer Service flow carries the finer-grained needs under that department. Its greeting: "You've reached ABC Company Customer Service. For order status press 1. For returns and exchanges press 2. To hear these options again press 3." Inside the flow, key 1 rings the order team, key 2 rings the returns member, and key 3 repeats the greeting.
This keeps the first layer short and puts the detailed scenarios one level down, so every caller hears only the options relevant to them.
Create a Call Flow
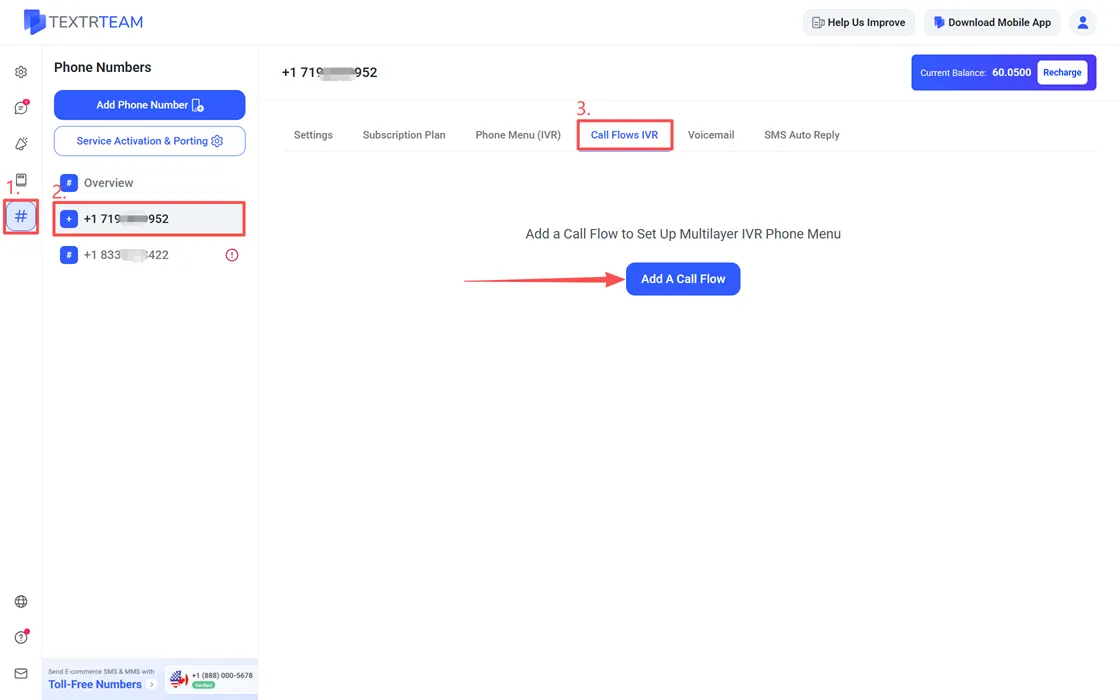
- Go to Phone Numbers, select the number, and open the Call Flows IVR tab.
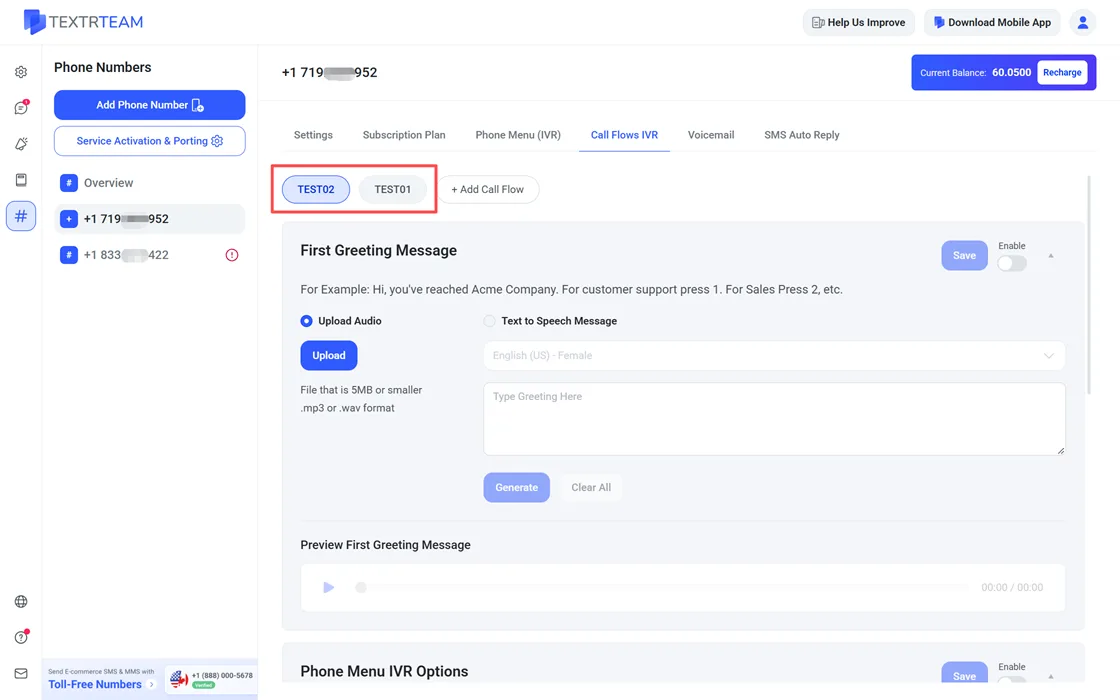
- Click + Add Call Flow. The new flow appears as a named entry at the top of the tab; names are yours to choose, so pick one that describes the purpose, such as Customer Service.
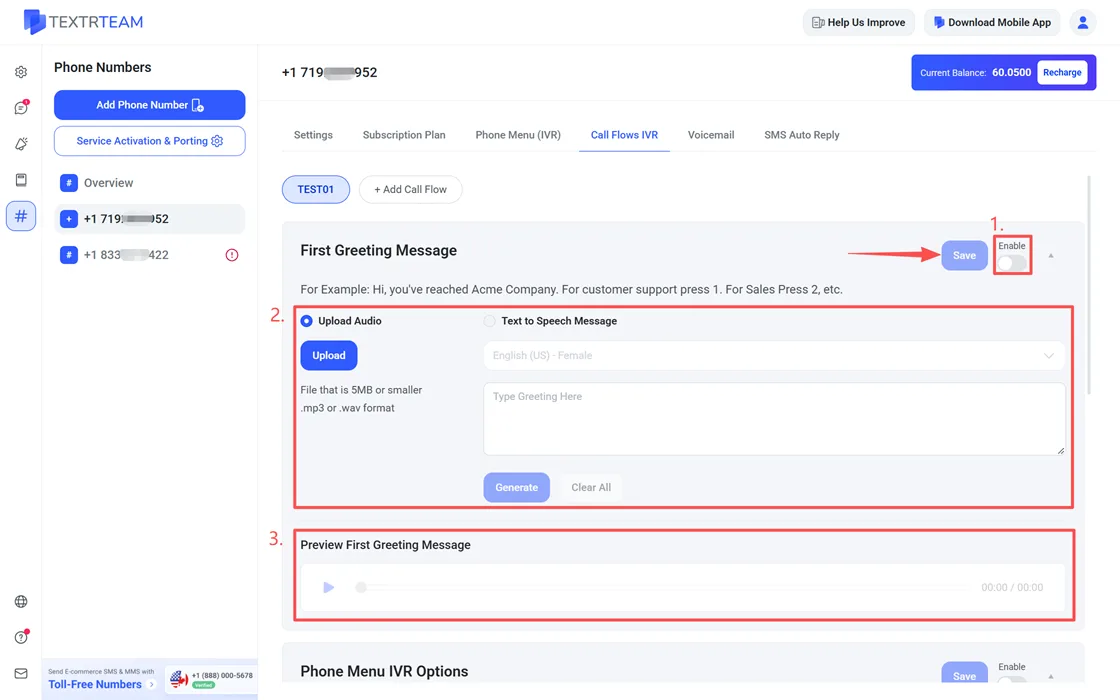
- Select the flow and configure the blocks:
First Greeting Message: upload audio (5MB or smaller, .mp3 or .wav) or generate it with Text to Speech Message, then preview and Save.
Phone Menu IVR Options: set Key, Action, Destination, and ring duration for each row; add rows with + Add Another Option.
Choose Action If IVR Option Is Not Selected Or Disabled: the fallback when no key is pressed, for example Forward to Voicemail after 5 seconds.
When Call Is Not Answered: what happens if nobody picks up inside this flow.
- Click Save.
Connect the Flow to the First Layer
- Open the Phone Menu (IVR) tab.
- In Phone Menu IVR Options, set a key's Action to Transfer Call to Call Flow.
- In Destination, pick the flow you created.
- Click Save. From now on, callers who press that key enter the flow and hear its greeting.
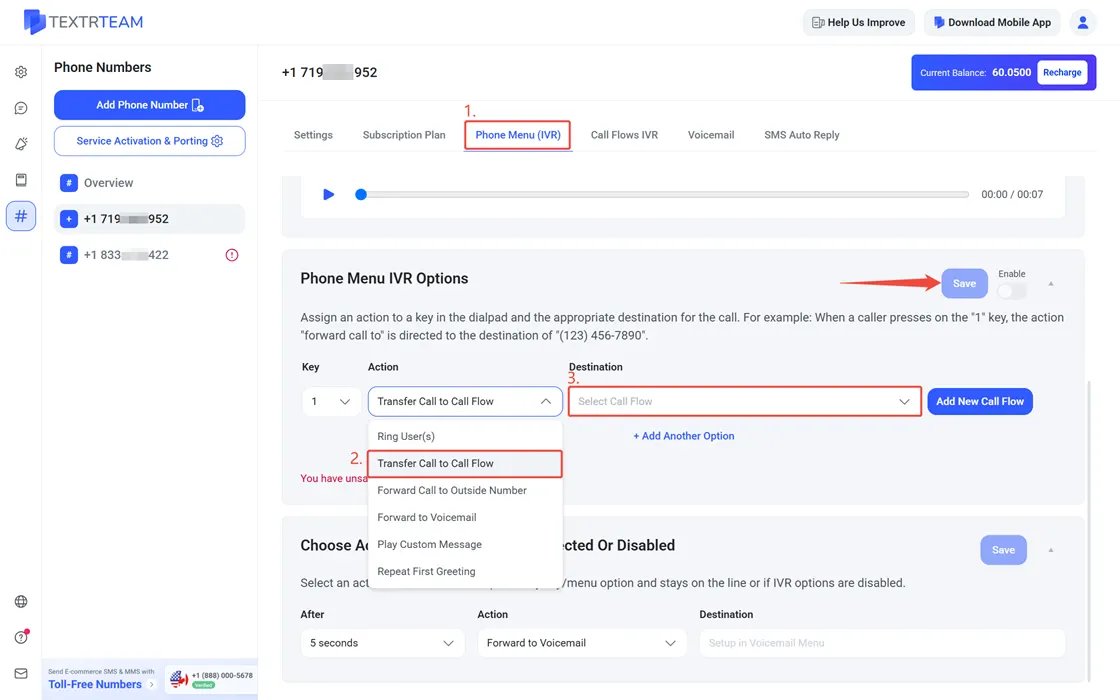
You can also reach flows from the phone menu page with the Set Up Call Flow and Add New Call Flow buttons that appear next to the Destination field.
Switch Between and Delete Flows
- Flows are listed by name at the top of the Call Flows IVR tab. Select a name to view or edit that flow.
- To remove a flow, select it, scroll down to the bottom and click Delete Call Flow.
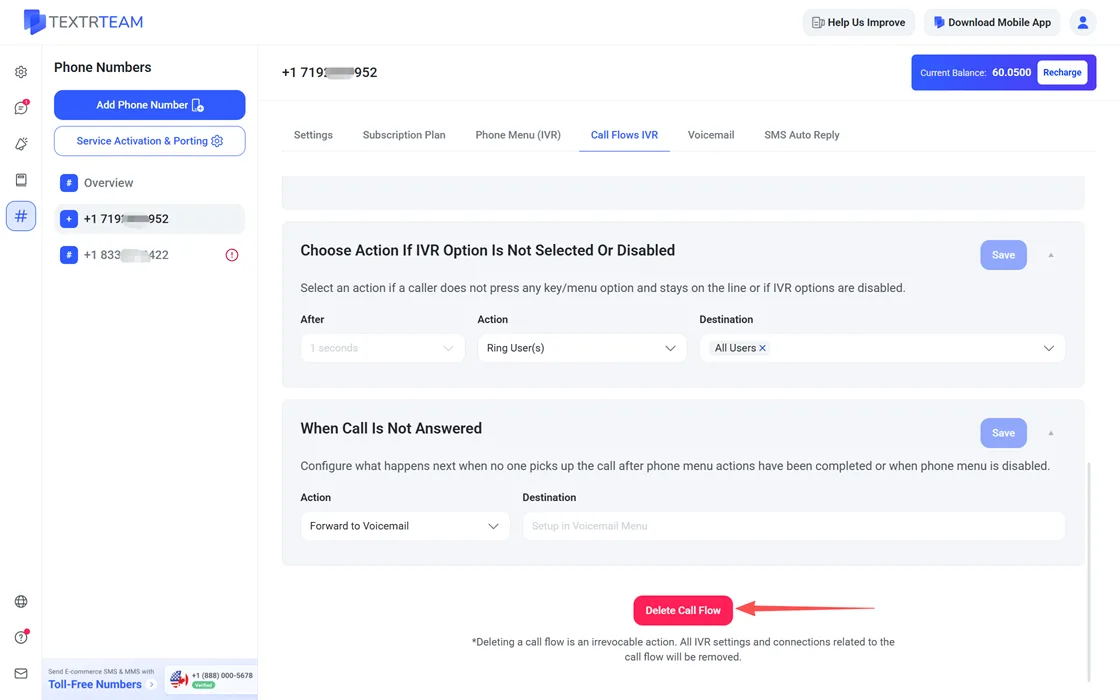
Warning: Deleting a call flow is an irrevocable action. All IVR settings and connections related to the call flow will be removed. If a first-layer key still points to a deleted flow, update that key's action.