
Overview
Your Textr Team workspace is where your team manages all customer communications. Configuring it correctly from the start ensures everyone has the right access, shares contacts efficiently, and captures call recordings when needed.
This guide covers three core setup areas: understanding roles and permissions, configuring shared contact lists, and setting up call recording preferences. For step-by-step instructions on inviting members, creating teams, or removing members, see the dedicated articles linked below.
Roles and Permissions
Textr Team has two roles:
| Role | Who Has It | Can Do | Cannot Do |
|---|---|---|---|
| Owner | The account creator (default) | Manage billing, invite/remove members, assign numbers, edit all settings, view all data, create and delete SMS templates | N/A |
| Team Member | Invited members (default) | Send/receive calls and texts, use assigned numbers, view own conversation history, create contacts, create and use own SMS templates | Invite/remove members, change settings, manage billing, delete other members' templates |
Roles are fixed. You cannot change a Team Member to Owner or vice versa. You can only Edit Name and Delete. For detailed instructions on managing team members, see:
Contact List Sharing Settings
Textr Team offers three contact list permission modes to fit different team workflows. Configure them under Settings > Team Settings > Contacts List Properties.
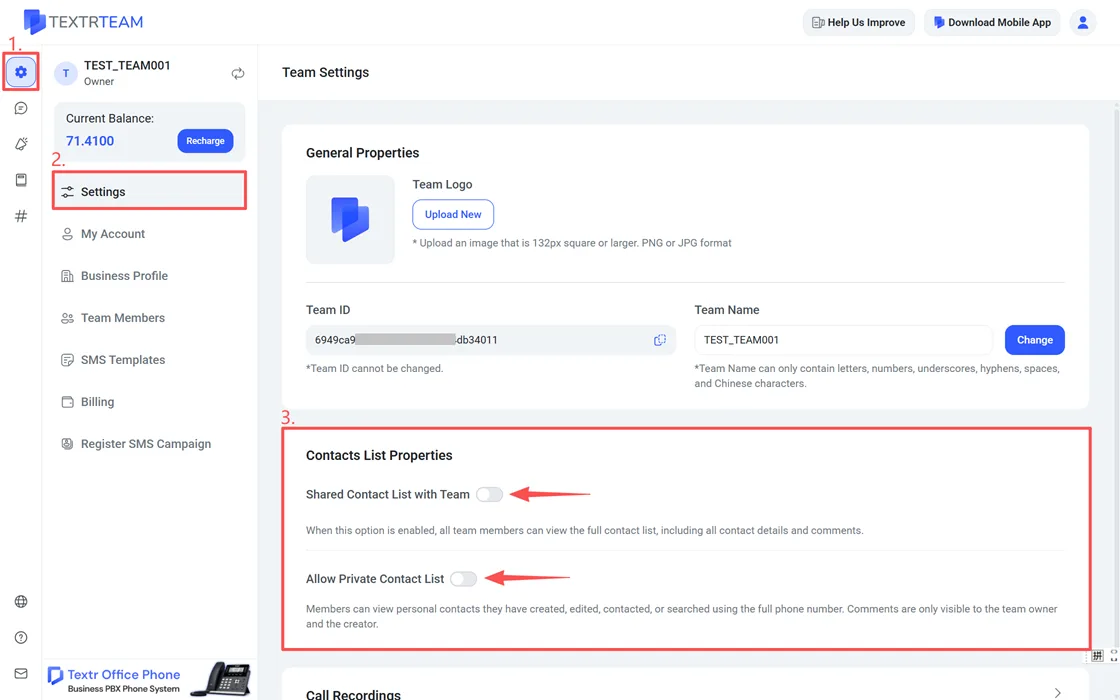
| Permission Mode | Description |
|---|---|
| Shared Contact List with Team Enabled | All contacts added by any member are visible to everyone. Contact details (name, phone, email, company, role, tags), comments, and tags created by any member are shared across the team. |
| Not Shared, Private Contact List Disabled | No member can view any contacts, including contacts they have previously messaged or called. All contact data is hidden from the entire team. |
| Not Shared, Private Contact List Enabled | Contacts a member has previously communicated with are automatically saved to that member’s personal list. Personal lists are not shared between members, but the Owner can view all personal lists. |
Note: Only the Owner can change the contact list permission mode. Switching modes takes effect immediately for all team members.
Learn how to add contacts and assign a tag.
Call Recording Preferences
Call recording helps with training, quality assurance, and dispute resolution. Configure recording settings under Settings > Team Settings > Call Recording.
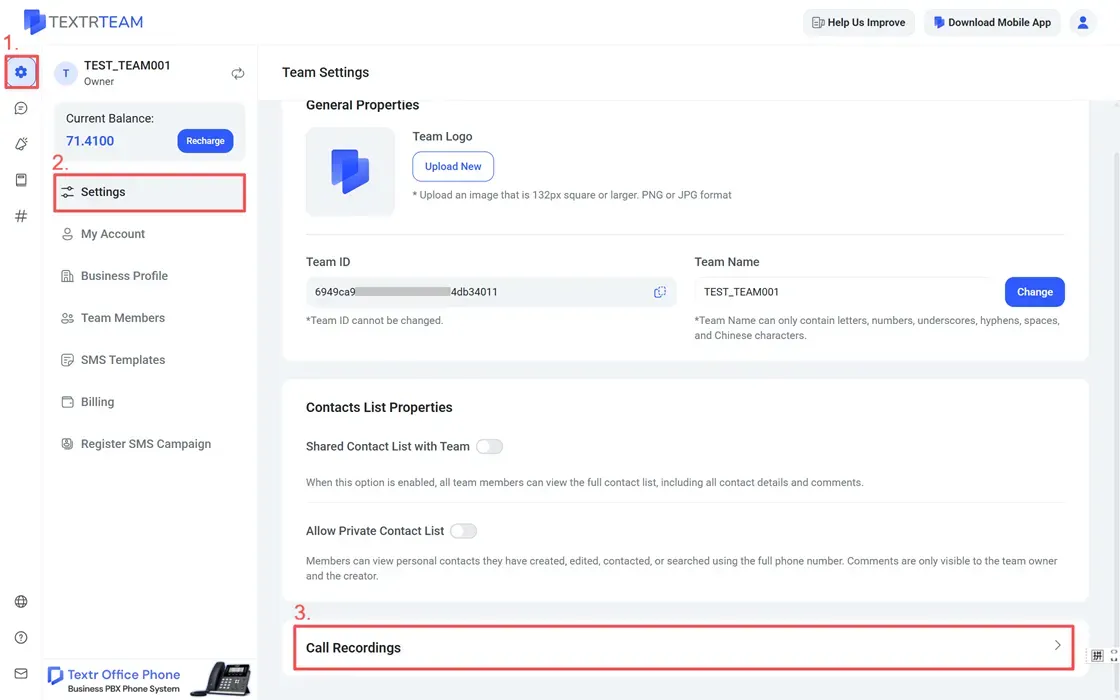
Enable auto-recording:
Toggle Enable Auto Recording to automatically record calls. Then select which phone numbers should be recorded under Phone Numbers. You can enable recording for specific numbers or all numbers.
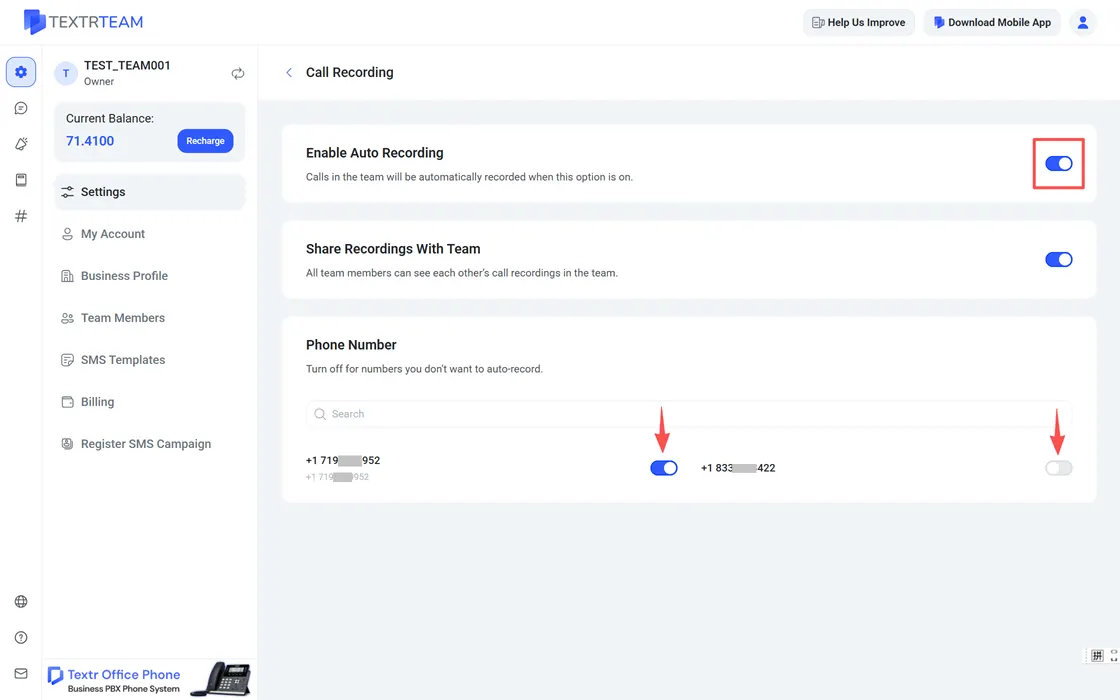
Share recordings with the team:
By default, only the person who made or received a call and the owner can see its recording. Toggle Share Recordings with Team to make all recordings visible to every member.
Where recordings are stored:
Recordings appear in the call history under # Numbers > Overview > Call History. They can be played back directly in the app.
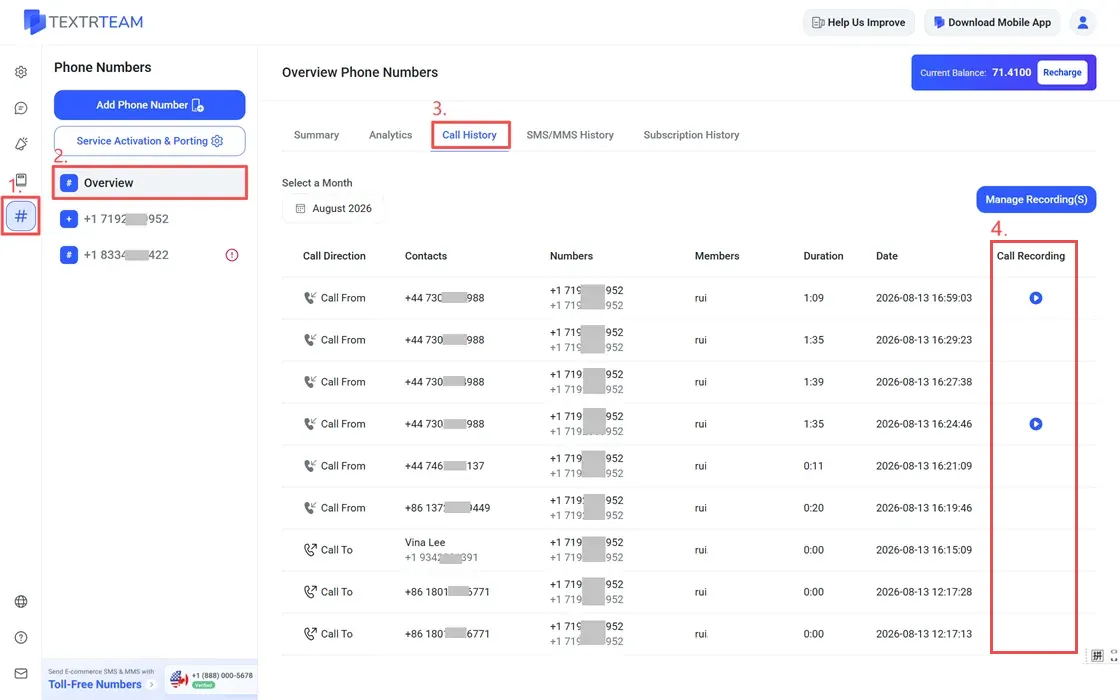
Note: Call recording is disabled by default. Any recordings made in this state are stored locally on the device and can only be accessed by the person on the call (regardless of whether they are a Member or an Owner). Uninstalling the app will permanently delete these local recordings.